Converting PICZA scanned artwork for RHINO
Rhino3D does not natively support the .PIX format that Roland Dr Picza outputs. There are a number of ways to take a .PIX pointcloud file and convert it into a surface or a mesh for use in Rhino.
After scanning your artwork as XYZ data in Dr Picza, we recommend you use the 'stereolithography' .STL format between applications.
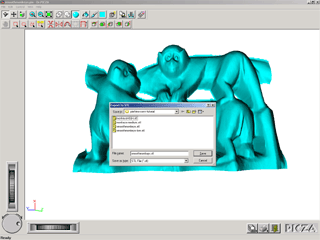
Extracting mesh data from Dr Picza:
- Open your .PIX scan file in Dr Picza
- Choose FILE > EXPORT > STL
- Use the BINARY file format, and choose an appropriate filename.
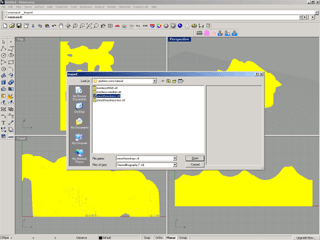
Importing mesh data into Rhino3D:
- Start Rhino3D and create a blank file in "millimeters".
- Choose FILE > IMPORT, and select 'stereolithography' .STL format.
- Select the .STL file you exported from Dr Picza.
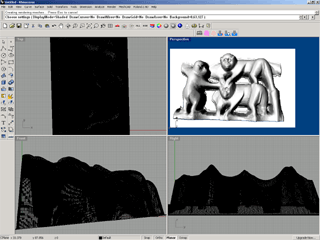
Handling mesh data in Rhino3D:
Some users may find MeshCAD for Rhino a useful plugin for working with meshes in what is predominantly a NURBS environment.
See MeshCAD for Rhino on the Sycode site. A 10-day / 100-use evaluation version is available. It may be valuable in your particular workflow.
Download the trial: meshcad_rh.exe (~2.9MB) from Sycode.
Working PIX surface data into NURBS for Rhino3D:
If users may prefer to work with their scan as a NURBS surface, a conversion is possible.
We recommend the free plugin "Pix Importer" from the Roland DG America site: import_pix.zip (~1MB) from Roland DG, which offers extraction of the pointcloud into Rhino as points, lines, polylines, NURBS curves, faces, polygon meshes, or as a NURBS surface.
Alternate conversion from Picza mesh to NURBS:
Another technique is to use the DRAPE operation to conform a NURBS surface over the top of a mesh.
- In Rhino, after importing the .STL file, use the DRAPE command.
- Ajdust the "Spacing" parameter to your desired resolution.
- In the XY plane, click-and-drag to create a surface completely covering the mesh.
Note, if one desires to have 'empty space' at what would be the 'bottom' of the scan file, a plane can be created some distance underneath the mesh so that the 'draped' surface falls away further. Turn off 'AutoMaxDepthDetect' when doing this.