Colin's FARM operation walkthrough
This walkthrough follows on from my Ring walkthrough. The aim is to give you a visual reference and a "walk through" on using the FARM program with your machine.
To suceed with FARM, it is imperative to read and follow the on-screen prompts as they come up. If prompted to wait until all movement has ceased, don't push any buttons until the rotary has ceased all movement!
Initially, if you do lose track of where you are or what you've done, for beginners it's best to exit FARM and start all over again. Be sure to clear all the commands in the print queue. This can easily be done with the "ClearPrintQueue" program supplied by Fourth Axis.
Some suggestions:
I created a folder on my computer to place all the cutting files from MP4 that will be used with FARM. Under a folder in "My Documents" will always be easy to find, so make a subfolder "FARM-cutting" or similar.
MP4 output for FARM:

In the previous tutorial you would have clicked on the "CUT" button at the very bottom of the 'control panel'. This will open the "Tool-Up Height" dialogue. [You can access this in the menu: Set > Cutting Position]
Enter 15mm, which in this case will give a 1mm clearance above the wax when the 'Surfacing' toolpath starts.

After you set the "tool-up height" the next dialogue will open. Make sure that the "Output to file" box is checked.
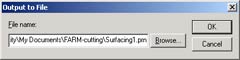
A new box will open. Click 'Browse' and find your previously created folder (e.g. My Documents\Farm-cutting). Click OK to save the .PRN files here, and do this for the surfacing, roughing and finishing cutting files.
Mill and wax preparations:
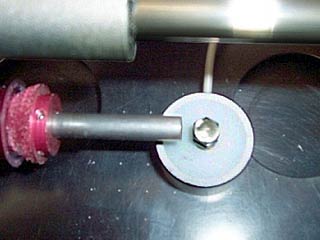
At this point if you haven't installed the Fourth Axis cone-clamp or the 4-jaw chuck, do so now. I made my own hybrid version cone clamp, and will be using it.
It's convenient to load my 'surfacing' cutter into the spindle collet at this time.
I also position the Z-zero height unit just at the end of the cone-clamp and try align it with the Y-centreline.
Starting FARM:
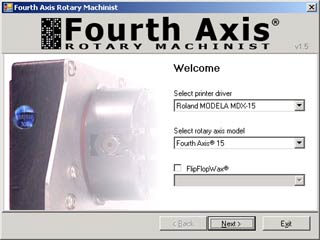
Now it's time to open FARM. This is the "Welcome" page you will be presented with, where I select the MDX-15 mill driver, and my Model-15 rotary. Click "Next".
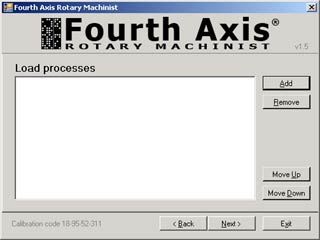
Now you will need to load your cutting files into FARM, which I will do in order on the "Load Processes" page. Click "Add".
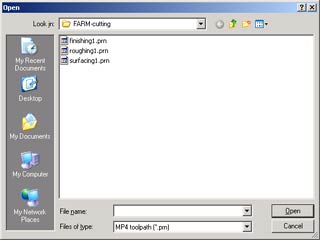
A new window will appear for you to locate your "FARM-cutting" folder on your computer. Once you've found it, click on "Surfacing1.prn" and click "Open".
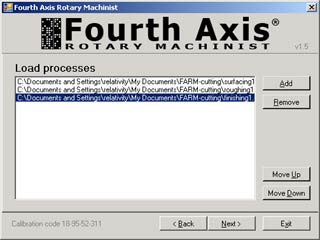
"Add" the roughing and finishing cutting files. FARM processes the files and will display the cut-files in order. Click "Next".
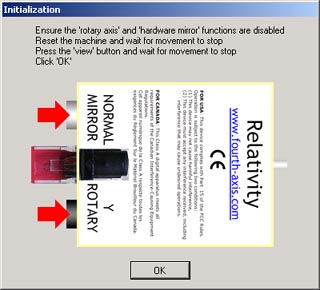
Now this interface-box instruction window will open. Note the positions of the control buttons on the image. Make sure these buttons are in this specific position before pressing anything on your computer or your mill!.
You may now follow the prompts, turn your mill ON and take it out of the view position. When and only when it has reached its home position and finished all movement, click the "OK" button on this window.
The window will now change to the "Position Setup" page. Enter your previously determined calibration for the Y-centreline position of your Fourth Axis unit.
In my case the Y-centreline is 34.75mm. Click the Y Model Origin "Move" button. Remember that the toolpaths have all been created with the model origin at its centreline.
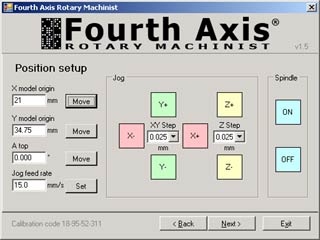
Remember that in the previous Ring walkthrough I scribed a centreline for my wax's length at 9mm. This is now used to align the cutter and get the correct X-centreline position for FARM. Don't worry if it takes a few goes to get the correct position, that's why I always scribe a centreline!
In my case the X centreline is 21mm. Write these figures down on paper in the event you need to exit FARM, or want to repeat the same cut. Click "Next".
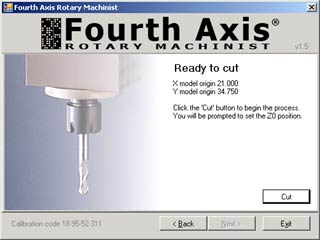
You will now be presented with this 'Ready to cut" page. Be sure to read and follow all prompts!
As I've already loaded my cutter previously, I can just click "OK".
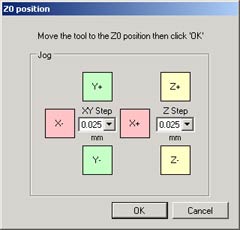
Now the "Z0 position" page will open.
Use the drop down boxes to change and set the amount the cutter moves in millimetres, 10mm, 1mm, 0.1mm, 0.025mm. Because I've placed my Z0 height unit at the end of the cone clamp, I just use the "X+" button to align.
Once aligned, I then use the "Z-" button, but I change to the smaller amounts otherwise the cutter could impact the unit and chip or break. Do it slowly and predictably.
You may instead prefer to slide the Z-gauge in and out from under the cutter after each increment/decrement.
When the yellow light on your Z-gauge comes on, you can click OK and your Z-zero-height is calibrated and memorized.
Pushing buttons:
This is the part where we need to "push the right buttons at the right time". It's very easy to follow and get it right, but you'll make a total mess of it if you don't read and follow the prompts.
Remember that the process relies totally on you as the operator to get it right; if you read each instruction and do the correct action when appropriate, you will eliminate any frustrating errors.
My best advice to you is "Concentrate, take it slowly, and read what is actually being displayed!"
Important:
Note the positions of your rotary's control buttons on the images as they come up on screen! Wait for all movements to totally stop before you click "OK" or press any buttons. It's important.
As I said before, if you do lose track of where you are or what you've done, for beginners it's best to exit FARM and start all over again. Be sure to clear all the commands in the print queue. This can easily be done with the "ClearPrintQueue" program supplied by Fourth Axis.
The motor may run for a couple of seconds in between processes; this is normal and expected, so don't be alarmed.
At this point the motor will run and the toolpath will start. As directed, don't push any buttons or click "OK" until your machine has stopped moving!
This "Please wait" window will stay on-screen while FARM processes the cut-file and sends it to the machine. For files larger than the machine buffer, you will need to wait until the last of the data is sent.
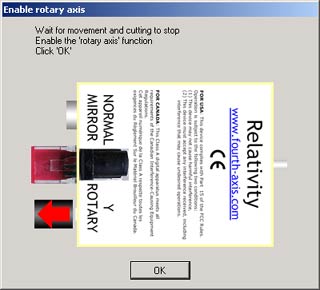
This next image will come on screen after you previously clicked "OK". Read the instruction page! Wait until the toolpath and the motor have completely stopped, THEN toggle the interface box buttons as displayed and click "OK".
You will be presented by another series of interface-box instruction pages as the machine needs to operate the Y and rotary axes alternately. Just follow them as you did earlier.
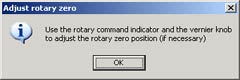
In my case, it isn't necessary to move the "Rotary Vernier Knob" for this particular model or toolpath, so I just click "OK".
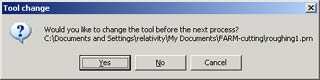
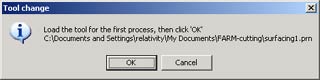
You'll now come to this screen. Because my toolpaths for "Roughing1.prn" and "Finishing1.prn" require a different sized cutter, I will click "Yes".
Change the cutter in your spindle to the correct size cutter for the "Roughing1.prn" toolpath, then click "OK".
Now the "Z0 position" page will open again. As before, I use the drop down boxes to change and set the amount the cutter moves. Because I'd placed my Z-zero height unit at the end of the cone clamp, I'll now use the "X+" and "Y+" buttons to line it up again.
Once aligned, I use the "Z-" button, taking care to move small amounts so that the cutter doesn't impact the unit.
Again, you can slide the Z-gauge in and out from under the cutter after each increment/decrement, which eliminates this risk.
From this point on, you just need to read the instructions and "push the right buttons at the right time" again, and the roughing and finishing processes will be executed by FARM.
I hope these tutorials will be of help to new Fourth Axis users.
This FARM walkthrough is presented by kind permission of Colin Creed, an experienced Fourth Axis user.