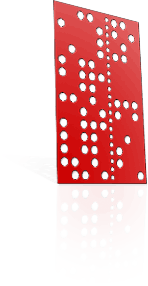
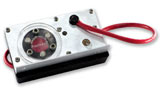
Tilt Motor Axis for Roland MDX-15 and MDX-20

Inside-ring engraving with our Tilt Motor Axis
Our new Tilt Axis tutorial covers the details using the Fourth Axis Tilt Motor Axis and Roland 3D Engrave to get your MDX doing inside-ring art.
Using Roland's free software is a real fast way to get into inside-ring engraving. We cover the use of a Proxxon 28481 and an MDX-20, and how to guarantee collision-free entry and exit of a tilted tool inside the ring.
New Fourth Axis 4-jaw chuck for Roland JWX-30 (or MDX-40A with ZCL-40A rotary)
Fourth Axis has also developed a 4-jaw chuck to suit your JWX-30 (or MDX-40A with ZCL-40A rotary).

JWX-30 and MDX-40A have an indexing pin and a 14mm 'center of the universe'
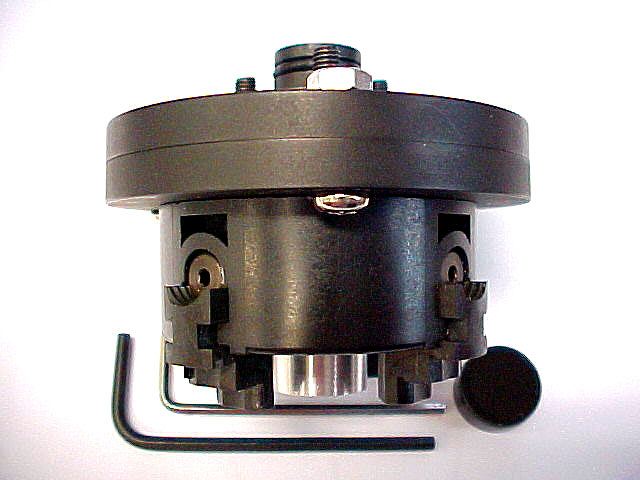
A rubber-ring centering boss provides ideal concentricity
New Fourth Axis 3-jaw and 4-jaw chucks for Roland JWX-10 (or MDX-40 with ZCL-40 rotary)
Fourth Axis has developed 3-jaw and 4-jaw chucking systems for the Roland JWX-10 (or MDX-40 with ZCL-40 rotary) which have unique features:
- Our chuck system is not mounted via a threaded post, because such mounting does not give ideal concentricity, nor permit dismount/remount to exactly the same rotation angle.
- The split mounting system relies on two precision plates - one secured concentric with the JWX-10 (or MDX-40 with ZCL-40 rotary) by three socket head screws, the second carrying the chuck mechanism. They align perfectly concentric, thanks to the one-piece stepped boss. Rotation is repeatable, thanks to rotation stops on the 3 joining screws.
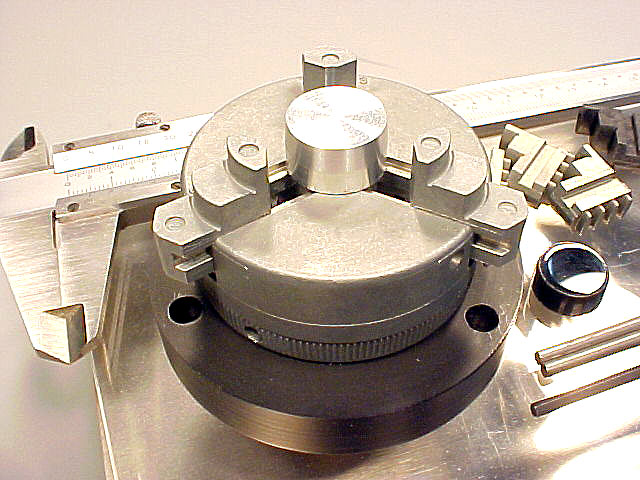
3 jaw automatic chuck with the included wax tube centering arbor in place.

Asymmetric objects, D-tubes, slabs can be accommodated easily.
Accessing the potential of your MDX-15 or MDX-20 machine
Roland MDX-15
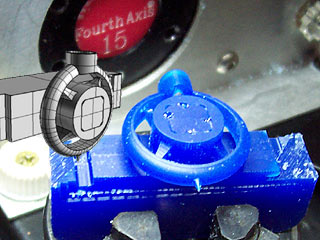
Fourth Axis Model 15HR
The Roland MDX-15 and MDX-20 are two Japanese-engineered, desktop-scale rapid prototyping machines developed by Roland DG. Both mills boast a high resolution, which allows for the capture and reproduction of fine details.
By themselves, these three-axis mills are limited to the scanning or milling of flat parts. Cylindrical, spherical, or double-sided forms are difficult to produce, because the tool only has access to the top surface of the material.
Imagine if your tool could access behind, or even underneath the object you are milling. Suddenly it becomes possible to produce rings, complex figurines and concave objects with undercuts. The Fourth Axis rotary is the only rotary add-on for a Roland machine that supports both scanning and milling operations, and is the ultimate accessory for your MDX-15 or MDX-20 platform.
Complex cylindrical artwork reproduced on a Fourth Axis
When you transform your Roland MDX-15 or MDX-20 mill with a Fourth Axis rotary, your machine can compete with the versatility of the more expensive Roland MDX-40 and JWX-10 mills. Without the need for customized fixtures, special waxes or software, now you too can manufacture artwork needing full rotary access, three-sided ring designs, or even just multiple XYZ cuts at different rotation angles - index cutting.
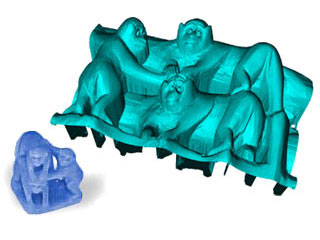
"Three monkeys" scanned in Dr Picza and reproduced from wax
Demonstration of FlipFlopWax three-sided ring-cutting technique
A Fourth Axis will revolutionize your MDX.

Our Model 15HR kit includes:
- Independent 4-jaw chuck kit
- Z-height gauge and y-adapter arm
- PDF manual
- FARM software CD-ROM
- Interface box and cables
Your Fourth Axis rotary can be installed in a short time by yourself, and does not require any modification of your host MDX15 or MDX20 machine.
When you purchase a Fourth Axis rotary, we can 'adopt' your whole system for support purposes -- not just the Fourth Axis, but also your MDX-15/MDX-20, your Roland software including Modela Player 4, your data cabling - the lot! If you have a difficulty with your MDX or your software workflow, we will do our best for you. Never again will you need to wonder "Should I call my dealer?" or worry about being buck-passed to Roland. Our mentality summarized: your success is a measure of our performance.
Our products allow you to open up the full potential of the MDX-15 and MDX-20 machines. We created the Model 15HR rotary axis and Model 20HR rotary axis to give you true 3D modelling freedom, and the Tilt Motor Mount to facilitate a superior 20,000rpm spindle to be mounted on your machine for better surface finishes and faster process times.
To maximize how you use your rotary, we offer a detailed PDF manual and 7-day email support. Our online tutorials cover everything from rotary scanning, to rotary milling, to our special FlipFlopWax three-sided ring-cutting methodology.
The Roland MDX-15 can be purchased from a Roland dealer. The Fourth Axis rotary can be purchased from us directly. Take a look around our site and use our inquiry form to get in touch. We'll be glad to answer any questions.
News! A new workflow for three-sided ring-cutting
Having seen jewellers struggle with the compounding complexities of three-sided ring-cutting, we've been looking at ways to make the process more straightforward and less prone to error. The new FlipFlopWax procedure, introduced on the Fourth Axis website, costs nothing and can be made to work with any machine.
FlipFlopWax is easy to understand and implement, and you can read our comprehensive guide by clicking here.
Traditional three-sided ring-cutting:
A great range of ring waxes can be manufactured using a three-pass process. In general three-sided ring-cutting, the wax blank from which the ring will be machined is mounted in three orientations:

1. Cut yellow material

3. Detail blue material

2. Cut grey material
- The first orientation allows side-detail and the ring's finger hole to be machined out of the middle of the wax (Side-A cut).
- The second orientation involves flipping the wax over and machining the detail on the ring's other side (Side-B cut).
- The third and final orientation involves mounting the wax for a full rotary cut of the band detail, OR mounting the wax at an index so that the mill can machine out the stone setting, OR both.
Several "wheel spokes" are often incorporated into the design to allow the ring to be held in the machine during the Side-A and Side-B cuts, and can be cut off to separate the ring for rotary cutting, mounted on a spigot. A two-coloured piece of wax makes this clearer:

1. Side-A cut

3. Full rotary cut

2. Side-B cut
At Fourth Axis, we have some concerns with existing three-sided-ring-cutting techniques
A steep learning curve is associated with progressing to three-sided ring cuts, whether they involve index or full rotary cutting. The cost in time to the user is magnified by confusing offsets, machine tramming procedures, and workholding difficulties.
While one approach to overcome these involves the use of "flipper fixtures", if available or compatible with your machine, these third-party fixtures are often expensive, can create overhang and flexibility issues, and can introduce user errors in their setup.
Many technical and topological hurdles prevent jewellers from achieving successful three-sided ring cuts
When you change your ring orientation, your Zs become Xs, your Xs and Ys become radii, and worse! Machine alignment and calibration is one black art that entry-level CAD/CAM/CNC jewellers may struggle with. On any given machine with a rotary axis fitted, factors such as axial runout, radial runout, end-play and backlash must be understood and minimized.
Only after solving these technical challenges does a jeweller have some hope of machining accurate waxes, which then raises questions of workpiece alignment between different passes, mounting repeatability, toolchanging, pitch and yaw.
FlipFlopWax three-sided ring-cutting:
Through discussion with Fourth Axis users and jewellers, we now propose a workflow which anybody can use. FlipFlopWax three-sided ring-cutting is a zero-spend technique, whose details we carefully document for you.
Colin Creed (Austatt Image Makers, AU) and Steve Crout (Jubilee Jewellers, NZ) deserve our deepest thanks for their expertise, test cuts and optimizations of this collaborative development.
In order to machine a three-sided cut on a wax ring, we create a standard wax spigot as part of the ring artwork, which stays mounted in the rotary throughout the whole process. The spigot is therefore freshly created, guaranteeing perfect concentricity and a known, accurate X-position.

The spigot is freshly machined in the Side-A and Side-B cuts

After cutting Side-A/Side-B, the wax ring is mounted for a full rotary cut
Using the FlipFlopWax procedure allows you to maintain perfect wax alignment throughout roughing and finishing processes on both ring sides, and then transfer that perfect alignment to an index cut or full rotary cut of the outside of your ring. There is no need for simultaneous four axes control, and in general no need for a tailstock.
FlipFlopWax is easy to understand and implement, and you can read our comprehensive guide by clicking here.
What can I do with a Fourth Axis®?
For you, Fourth Axis® provides new machinery and new techniques to allow rotary milling of almost anything, from rings, sculptures, souvenirs and industrial prototypes, from chemical wood, foams, machinable wax, plastics or nonferrous metals, using standard CAD/CAM software.
Rotary axis 3D milling & scanning micromachines:
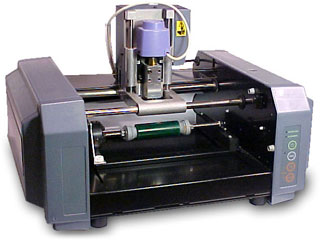
Roland MDX-20 fitted with Fourth Axis and tailstock
In conjunction with your Roland MDX-15 or MDX-20, Fourth Axis® makes possible:
- rotary 3D-capture of existing objects,
for inclusion in jewelry, rapid prototyping, or artistic work, - rotary 3D-milling of any artwork,
supporting XZ and Rotary-Z slicing, or just XYZ work at any arbitrary index.
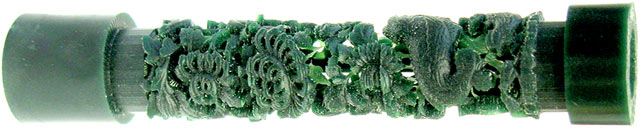
Pictured right is a Fourth Axis® Model 20HR rotary axis, fitted in a Roland MDX-20 rapid prototyping machine. A green ring-wax tube is mounted using our optional spigot adapter kit, ready to cut.
We scanned the carving using a Roland PIX-30, wrapped it up into a cylinder in Rhino, and it can be milled using Modela Player 4. See our tutorial